PDR Repair Best Practices
These pages serve as a guideline to inform technicians, adjusters, body shops, and the general public about the procedures that may be necessary for proper Paintless Dent Repair (PDR) on a vehicle. While not all listed procedures are required in every situation, they provide valuable insight into those that might be needed and should be carefully considered when requested by the technician performing the repair.
Vehicle Condition:
The estimate should be conducted on a clean vehicle, in an indoor environment, and with the use of professional PDR lighting equipment.
Determining Dent Size:
When using the sizing coin or magnet, the dent must fit entirely within the measured circle for it to be classified as that specific size. If any part of the dent extends beyond the edges of the circle, it should be categorized as the next larger size and not estimated as a smaller one. The affected area is determined by the PDR technician and may include a surface area larger than the visible indentation.
Determining Double Panel And/or Heavily Braced Panels:
The vehicle should first be inspected to assess the level of access difficulty. This evaluation extends beyond commonly considered areas such as roof rails, doors, and deck lids. It also includes less frequently discussed sections like the front of hoods, tops of doors, areas beneath belt moldings, front portions of quarter panels, and deck lids—all of which are often heavily braced. A panel is classified as heavily braced or double-paneled when there is little to no direct access to the damaged area.
Special Cautions:
The details in this guide should be applied with consideration to the unique circumstances of each situation. No two dents, storms, or technicians are exactly the same, and each case should be evaluated individually. Factors such as repair location, storm-specific damage, pre-existing damage in the affected area, and other variables must all be taken into account. Each claim should be assessed on its own merits.
Estimating Explanation:
The necessity of the following procedures should be determined at the discretion of the servicing PDR technician. These steps may be required to access damaged areas before beginning the dent removal process. All R&I (Remove and Install) techniques should be performed in accordance with the manufacturer’s specifications. Please note that the procedures listed below do not include dent removal, panel cleaning or preparation, or marking/highlighting damage for estimating purposes.
The condition of the vehicle’s finish is crucial when evaluating the suitability of Paintless Dent Repair (PDR) as a repair method. Achieving a high-quality PDR outcome requires the paint to be in good condition. Several factors may limit the ability to fully restore the vehicle to its original factory condition, including but not limited to:
- Removal of wax or paint sealant
- Reapplication of wax or paint sealant
- Matte or satin paint finishes
- Vehicle wraps
- Stripes, decals, transfers, or overlays
- Non-factory (aftermarket) paint
- Cracked, chipped, or deteriorated paint
- Rock chips
- Pre-existing damage unrelated to the storm event
- Damage caused by storm debris, such as falling tree branches or wind-driven objects during high winds
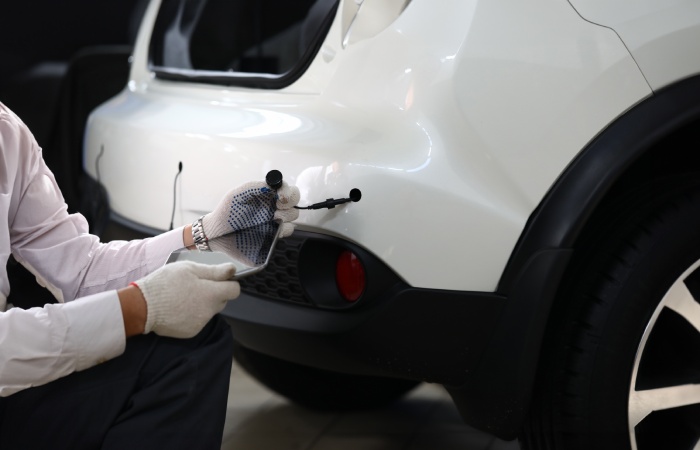
Remove & Install Procedures For Hail Damage Repair Using Pdr Method:
The removal and installation (R&I) of any obstruction necessary to gain visibility, access, or leverage on the backside of the damaged area—on any vehicle—may result in additional charges, as determined by a qualified technician.
Fundamental PDR Procedures:
- Lifting the vehicle when necessary to improve visibility, access, or to perform the repair
- Removal and installation (R&I) of any obstructions deemed necessary by the technician to gain access or leverage behind the damaged area
- Vehicle preparation, including but not limited to the removal of dirt, snow, ice, and other debris
- Light buffing as needed to properly see and repair the damage
- Repairs on tall vehicles
- Panels containing laminated glass
- R&I of aftermarket components
- Areas of vehicle paneling sealed with ribbon sealer
- Resetting vehicle systems such as PCM/BCM, ABS, taillights, window memory, power liftgate, etc.
- Removal and reinstallation (R&R) of pinstripes, vinyl decals, stripes, and clear bra protection
- Application of corrosion protection
- Removal and reapplication of paint sealers and wax
- Repairs involving extended roofs
- Roof rails and glue pulling procedures
- Sound deadening and panel stiffening materials
- Glue bonding between panels and bracing
- Hood and hood clip repairs
- Weatherstrip clips
- Fender repairs
- Wheel opening molding clips
- Door repairs
- Quarter panel repairs
- Cab corner repairs
- Liftgate or decklid repairs
- Cowl panel repairs
- Additional labor and materials for glue pulling
- Refinishing undersides of painted panels when soft tipping is not feasible
Glass:
Removal of the back glass on trucks should be considered if any of the following conditions apply:
- The glass is a single pane
- The sliding glass window does not allow sufficient access for a complete and proper repair
- The vehicle has a ribbed roof
Paint:
- Wax/paint sealer removal
- Wax/paint reapplication
- Matte finish
- Non factory paint
- Damaged/checked paint
- Replacing corrosion protection
Metal:
- High-strength steel
- Ultra-high-strength steel
- Aluminum
- Extra-thin metal
- Aftermarket panels
- Panels with previous conventional repairs or repainting
Standard & Additional Operations for Hail Damage Repair
The R&I procedures listed under the Included Operations section are considered standard and necessary for proper repair. Items in the Not Included Operations section are not standard and may incur additional costs upon evaluation.
HOOD:
To provide access for repairs, the following items may need to be removed from the vehicle:
- Hood insulator pad
- Removal and securing of the hood panel in a workable position
- Reinstallation of the panel to its original position after repair
- Hood scoops
- Air deflectors or bug guards
- Clear bra protection
- Grille
- Hood moldings and trim pieces
- Washer nozzles
- Weatherstrip
FRONT FENDER:
- Fender liners
- Headlamps (some vehicles may require front bumper removal to access headlamp mounting points for full removal)
- Grille
- Clear bra protection
- Plow frame
- Bumper guard
- Side marker light
- Air intake housing
- Windshield cowl
- Hood hinges
- Deflectors and trim pieces located in the engine bay or inner fender
- Wheel flare
- Appearance grille
- Electronics
- Sound deadening materials
DOORS:
- Door panel
- Belt moldings
- Vapor barrier
- Sound deadener
- Speaker
- Aftermarket window visor
- Mirror
- Exterior handle
- Striker catch
- Regulator assembly
- Weatherstrip
- Wire harness
- Door removal as needed
- Laminated glass window
- Side view mirror
QUARTER PANEL:
- Tail lights (on some vehicles, removal of the rear bumper is required to access the tail light mounting points for complete removal)
- Interior trim
- Moldings
- Quarter glass
- Fuel door
- Computer modules
- Sound equipment
- Antenna motor
- Bumper
- Wheel
- Wheel opening trim / wheel flare
- Fuel door repair
BEDSIDE:
- Tail lamp
- Bed rail caps
- Camper shell or tonneau cover
- Rear wheel
- Wheel opening trim and flares
- Headache rack
- Toolbox
- Bumper
RAILS:
- Drip molding supplies
- Adhesive materials
ROOF:
- Headliner R&I
- Overhead console
- Rearview mirror
- Roof-mounted audio/visual equipment
- Liftgate or hatch on SUVs, vans, and crossovers
- Airbags
- Roof racks
- Roof-mounted antenna
- Roof-mounted third brake light
- Additional lamps
- Back glass on coupes and trucks
- Quarter panel glass
- Sunroof, including tray when applicable
- Liftgate or rear hatch
- Windshield and/or rear glass
- Restraint systems
- Exterior adhesive trim
- Drip moldings
- Sound deadening materials
DECK LID:
- Interior liner
- Removal and securing of the panel in a workable position
- Reinstallation of the panel to its original position after repair
- Third brake lamp
- Deck lid interior handle
- Additional panel-mounted lamps
- Spoiler
- Wiring harness
- License plate trim piece
- Backup camera
SUV HATCH / LIFTGATE
- Interior trim
- Removal and securing of the panel in a workable position
- Reinstallation of the panel to its original position after repair
- Liftgate-mounted tire
- Spoiler
- Glass
- Moldings
- Panel-mounted lamps
- License plate trim piece
- Wiring harness
- Third brake lamp
- Washer nozzles
- Washer hoses
- Wiper arm
- Weatherstrip
- Backup camera
TAILGATE:
- Trim panel
- Removal and securing of the panel in a workable position
- Reinstallation of the panel to its original position after repair
- Handle assembly
- Latch assembly
- Rail cap
- Ladder assembly/grab bar
- Third brake lamp
- Backup camera
LABOR TIMES:
Labor times should be used to estimate the time required to remove and reinstall vehicle components that obstruct access to damage repair areas. These times may vary based on factors such as the size, depth, and location of the dents, the vehicle’s age and condition, the technician’s experience and equipment, as well as the vehicle’s make and model. Labor rates are typically determined by the regional location.
Because of the wide variety of storm damage and vehicle conditions, labor times for the following items may be added to an estimate. Multiple items per panel may be necessary, as many panels require the removal of several components to gain proper access. The items listed below, which are not exhaustive, may result in additional repair costs and/or removal and installation (R&I) time:
Dents that do not qualify for standard pricing
- Oversized Dents – Even slight increases in size can significantly raise the complexity of the repair. Dents comparable to a half dollar, egg, tennis ball, baseball, softball, or grapefruit should each be categorized and assessed individually due to their unique repair challenges.
- Multiple interconnected dents, or any dent located within the impact zone of another, require special consideration.
- Deep or sharply defined dents
- Stretched or elongated dents
- Dents located on corners or edges
- Dents on tight- radius or highly rigid curves
- Creased dents
- Dents on ribbed roof sections
- Dents on large or extended body panels
Actress & Model
Lorem ipsum dolor sit amet, consectetur adipiscing elit. Ut elit tellus, luctus nec ullamcorper mattis, pulvinar dapibus leo. Elementum pulvinar etiam non quam lacus suspendisse. Egestas congue quisque egestas diam.

Followers Across YouTube, Facebook And Instagram.

Enim nunc faucibus a pellentesque sit amet porttitor. Porttitor rhoncus dolor purus non enim praesent elementum facilisis leo. Imperdiet massa tincidunt nunc pulvinar sapien. Nunc eget lorem dolor sed viverra. Felis bibendum ut tristique et egestas quis ipsum suspendisse.
Molestie at elementum eu facilisis sed odio morbi quis. Elementum pulvinar etiam non quam lacus suspendisse. Egestas congue quisque egestas diam. Id diam vel quam elementum pulvinar etiam. Phasellus vestibulum lorem sed risus. Consectetur adipiscing elit duis tristique sollicitudin nibh sit amet. Vel orci porta non pulvinar neque laoreet suspendisse interdum consectetur. Duis ut diam quam nulla porttitor massa id.
My Gallery
Lorem ipsum dolor sit amet, consectetur adipiscing elit. Ut elit tellus, luctus nec ullamcorper mattis, pulvinar dapibus leo.